Michel Bardet is a french SIB builder who has built for over 40 years. His SIB's are absolutely incredible and have won several awards. If you haven't seen his site please visit it here http://michel.bardet.pagesperso-orange.fr/indexa.htm. The reason I bring this up is because his site also has a lot of great building techniques that are easy to understand and it's where I got this picture.
These are five different techniques of attaching the mast. I'll quickly explain each one.
The first method is to drill a small hole in the deck and place the mast in. This can be tricky with your back stays. If the hole is shallow the mast will slide right in and the back stay's will remain tight. To deep and it's hard to get the mast's in unless the back stays are detached from the ship. It does however create a realistic look in that there are no hinges or anything showing how the mast got into the bottle.
Second method is drilling a hole through the ship and having a guiding line that pulls the mast into place. This can be tricky since it's adding more stings coming out of your bottle and if you get to mixed up your sunk. Which is what happened when I tried this method. It is great though in that the masts can be removed completely from the ship and even put in the bottle separately.
Third is making a very shallow hole for the mast. I haven't tried this one but I assume you need to have tight stays to keep the mast in place. This would allow for the masts to be inserted separately as well.
Fourth is the hinge method. Your masts are held down by a hinge and are pulled up using the forward stays. This is the most common method and is a great place to start.
Fifth is what is known as the Hinkley Hinge so named after Jack Hinkley who invented it. I have not personally tried this one either but I see it as a definite upgrade to the regular hing method. It keeps the mast perfectly straight as it raises up unlike the regular hinge that may fall off to the side. It also hides the hinge creating a more realistic look.
The reason so many different styles is important is because one style may not work for the type of ship your building. For instance I mentioned earlier my usual hinge method would not work for the Adventure. This is because with the multiple decks I had no space to fit the masts all stacked up on deck connected to hinges.
It's important to remember there is no wrong or right way to SIB building. It's like painting with water colors as opposed to oil paints. You use what works and what gives you the best result for what you are trying to portray.
So with regards to my Adventure Pirate Frigate here is how she looked before going into the bottle.
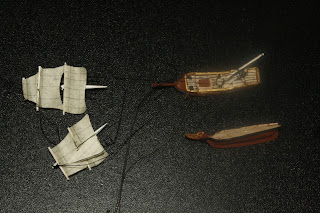
Here you can see my split hull and my two forward masts completely separated from the ship. The mizzen mast was small enough to fit with the hull so I used the first technique shown in the picture above and drilled a shallow hole for the mast to go into.
The tricky part of this method was the rigging. The forward stays ran through the forward masts while the back stays were glued on after the ship was placed in the bottle. I drilled deep holes in the mast that helped guide my split hull pieces together and held the masts straight so the back stays could be positioned correctly.
I also used a different method in that I hung the ship from a string through the cork allowing the ship to appear to float in the bottle. I like this method because it is easier and cleaner then trying to get clay or putty into a bottle and it allows you to see the entire ship and not just above the water line. The idea came from a feature by Greg Alvey at Folkartinbottles.com. Here's the link. http://www.folkartinbottles.com/featured/114-suspended-models
In conclusion the Adventure turned out well and was a lot of fun to build. Here is the pictures of the final result.
And a little fun with Photoshop.
Keep building and exploring new methods and thanks for reading.


No comments:
Post a Comment